Eclipse has a default Java code formatting profile, known as Eclipse [built-in], which it uses to format code every time you press the combination keys Ctrl + Shift + F (on Windows) and ⌘ + ⇧ + F (on Mac).
However, the Eclipse [built-in] profile is not the perfect way of styling code and also it is not modifiable. This necessitates the creation of a custom Java code formatting profile in Eclipse which can be used a part of coding standards within an development team. So how to create and share Eclipse code style formatter?
This post talks about the steps required to create a custom Java code formatting profile in Eclipse which can be then shared within a development team using any collaboration tool like SVN, CVS etc. A sample Java code formatter is also attached at the end of this post which contains the most common Java code formatting standards.
How to create a custom a Java code style formatter in Eclipse
Step 1
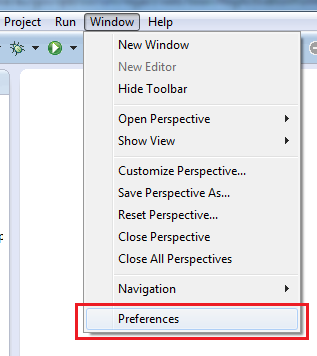
Open Eclipse and go to Window -> Preferences
Step 2
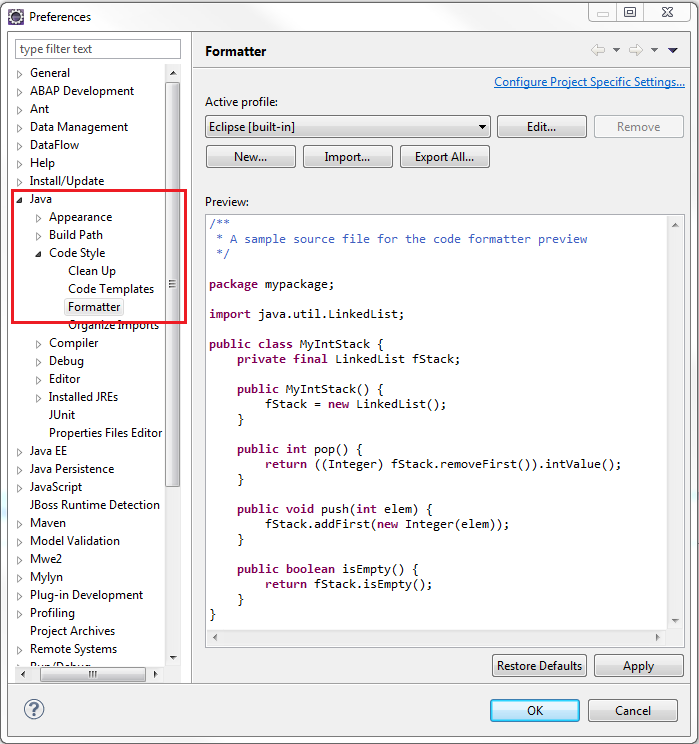
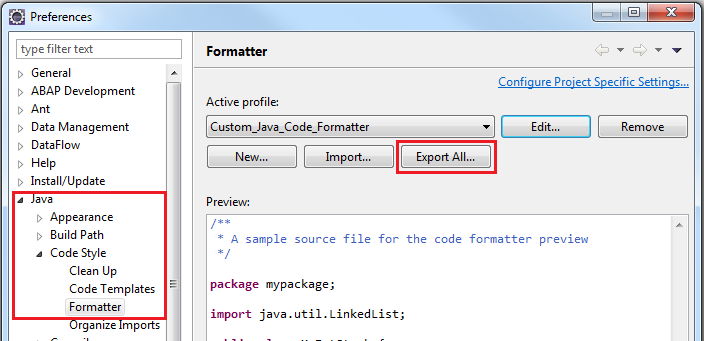
In Preferences window, go to Java -> Code Style -> Formatter
This will open up the Formatter options in the right window pane.
Step 3
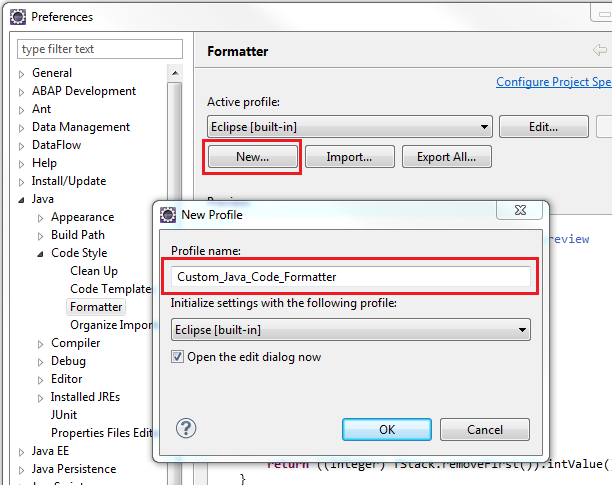
Click on New button to create a new code formatting profile using the Eclipse [built-in] profile as a template. Provide a new name to the profile and click on OK to save and open the new profile.
Step 4
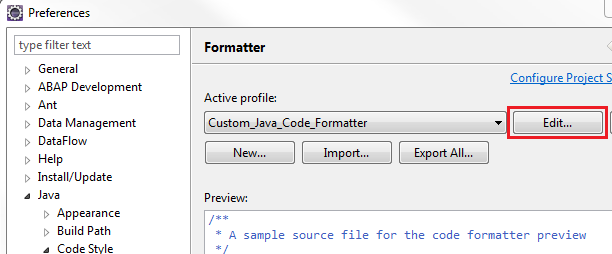
Click on the Edit button to open the profile in edit mode.
The following 8 tabs have properties which can be modified:
- Indentation
- Braces
- White space
- Blank lines
- New lines
- Control statements
- Line wrapping
- Comments
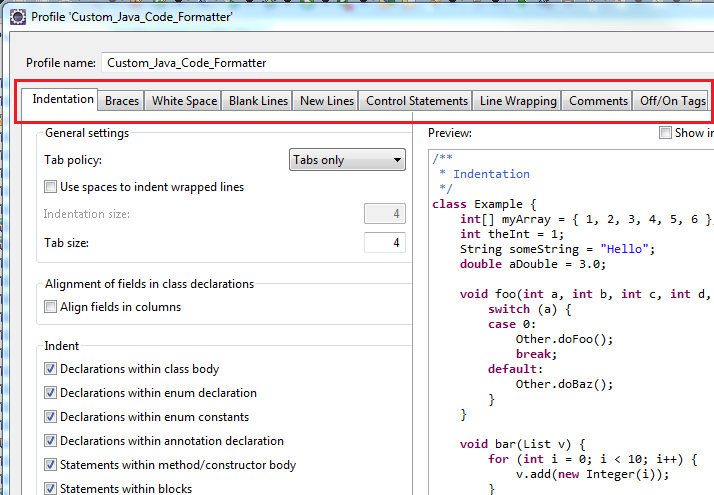
Make sure to click on Apply button at the bottom on each tab after modifying and click on OK button at the bottom to close the edit mode. Finally, after making all the required changes, click on Apply and then on OK button to make the newly modified profile as the Active profile.
How to export Eclipse code style formatter
When a custom code style formatter is create in Eclipse, it is usually meant to be shared within a development team to enforce coding standards. Following steps would allow to export the profile as an XML file which can be distributed through a code repository (SVN, CVS etc) from where other team members can import it in their local Eclipse installations.
Step 5
Open the code style formatter profile to be exported and click on the Export All button. Provide a name and location where the profile would be saved as an XML file.
How to import Eclipse code style formatter
Step 6
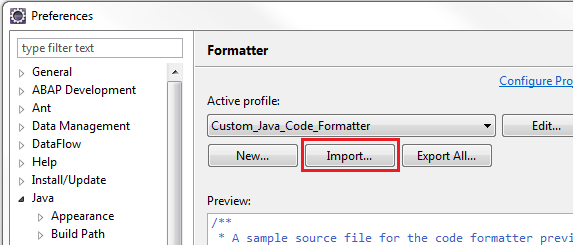
Click on the Import button and provide the path to the code formatter XML file. Click on Apply and then on OK button to activate the newly imported profile.
In continuation of the above, read my next post on How To Enable Auto Formatting In Eclipse
